We’re excited to introduce “Actions” – a major enhancement to our alert scripting feature within our exclusive toolkits. Actions are triggered by user-defined conditions and perform specific tasks when those conditions are met. Giving users more control over alerts, allowing you to cancel sequences, filter, assign, or display visual elements directly on the chart.
What's New?
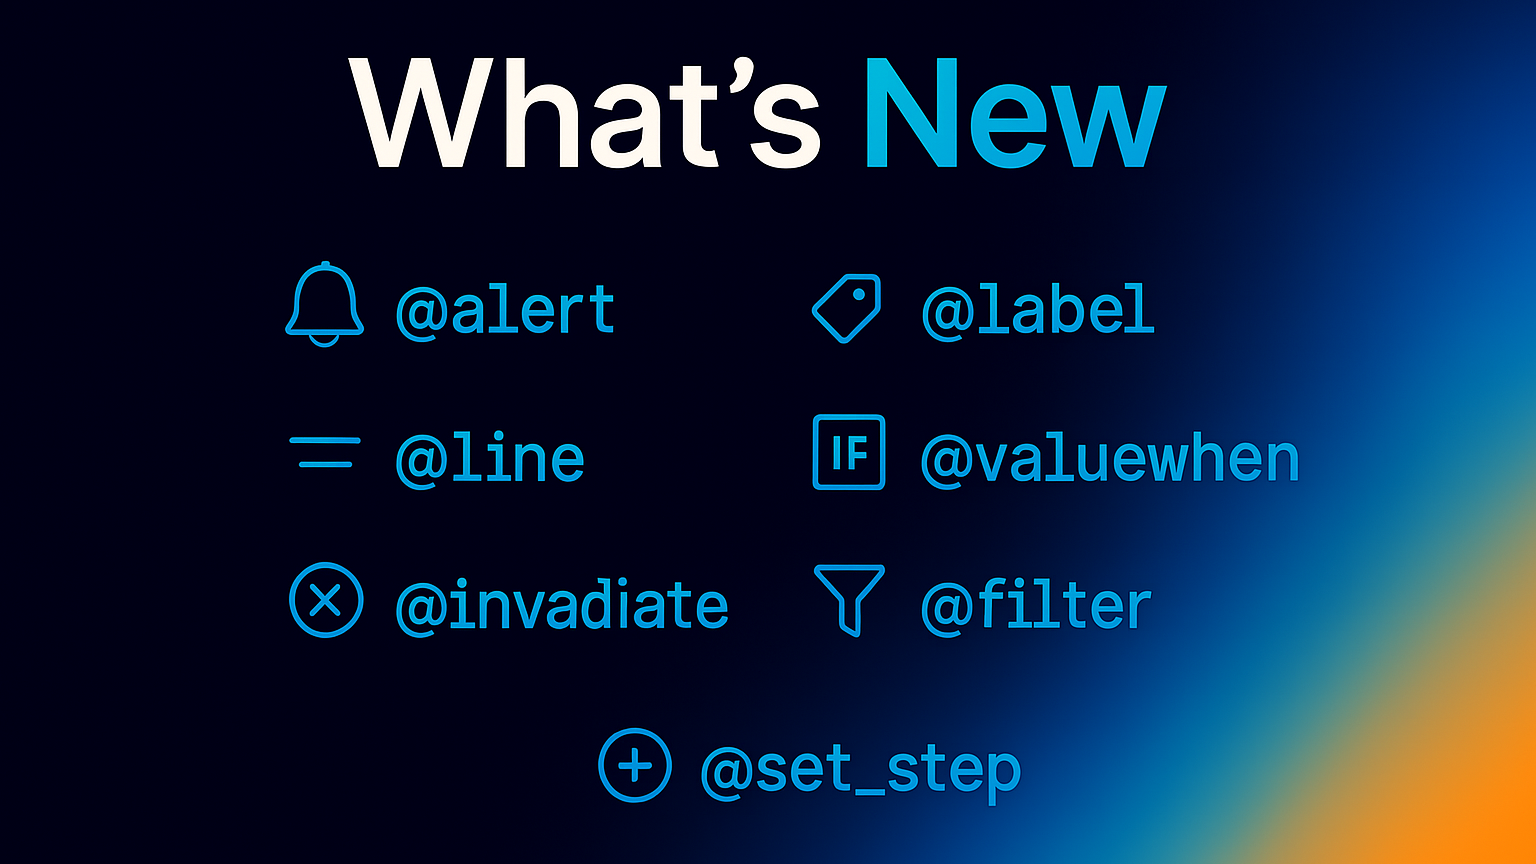
There are seven actions that can be called. They are identified using the “@” symbol, and like functions in traditional programming languages, actions can include arguments in parentheses to give you even more control over what they do.
Actions will always have the structure @keyword() = ..., starting with @, with an identifier, and ().
= will assign to the action a condition. When the assigned condition is true the action will trigger.
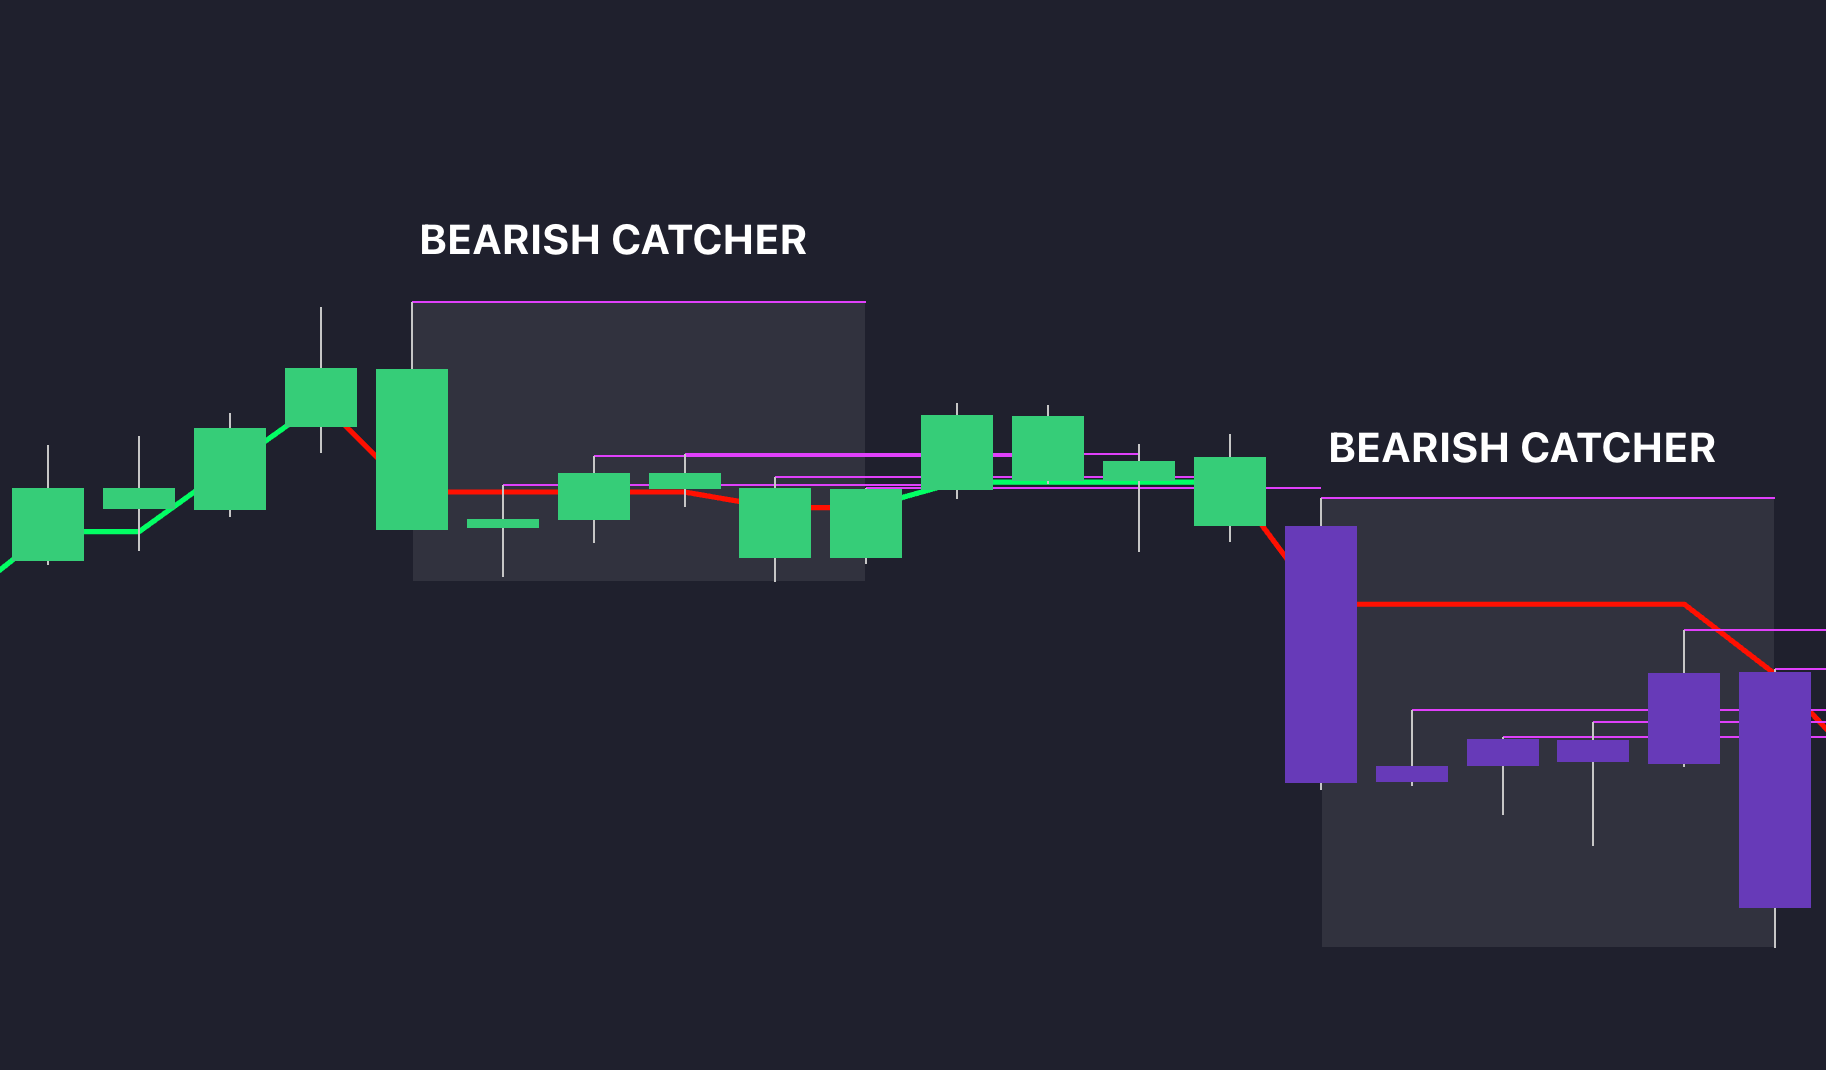
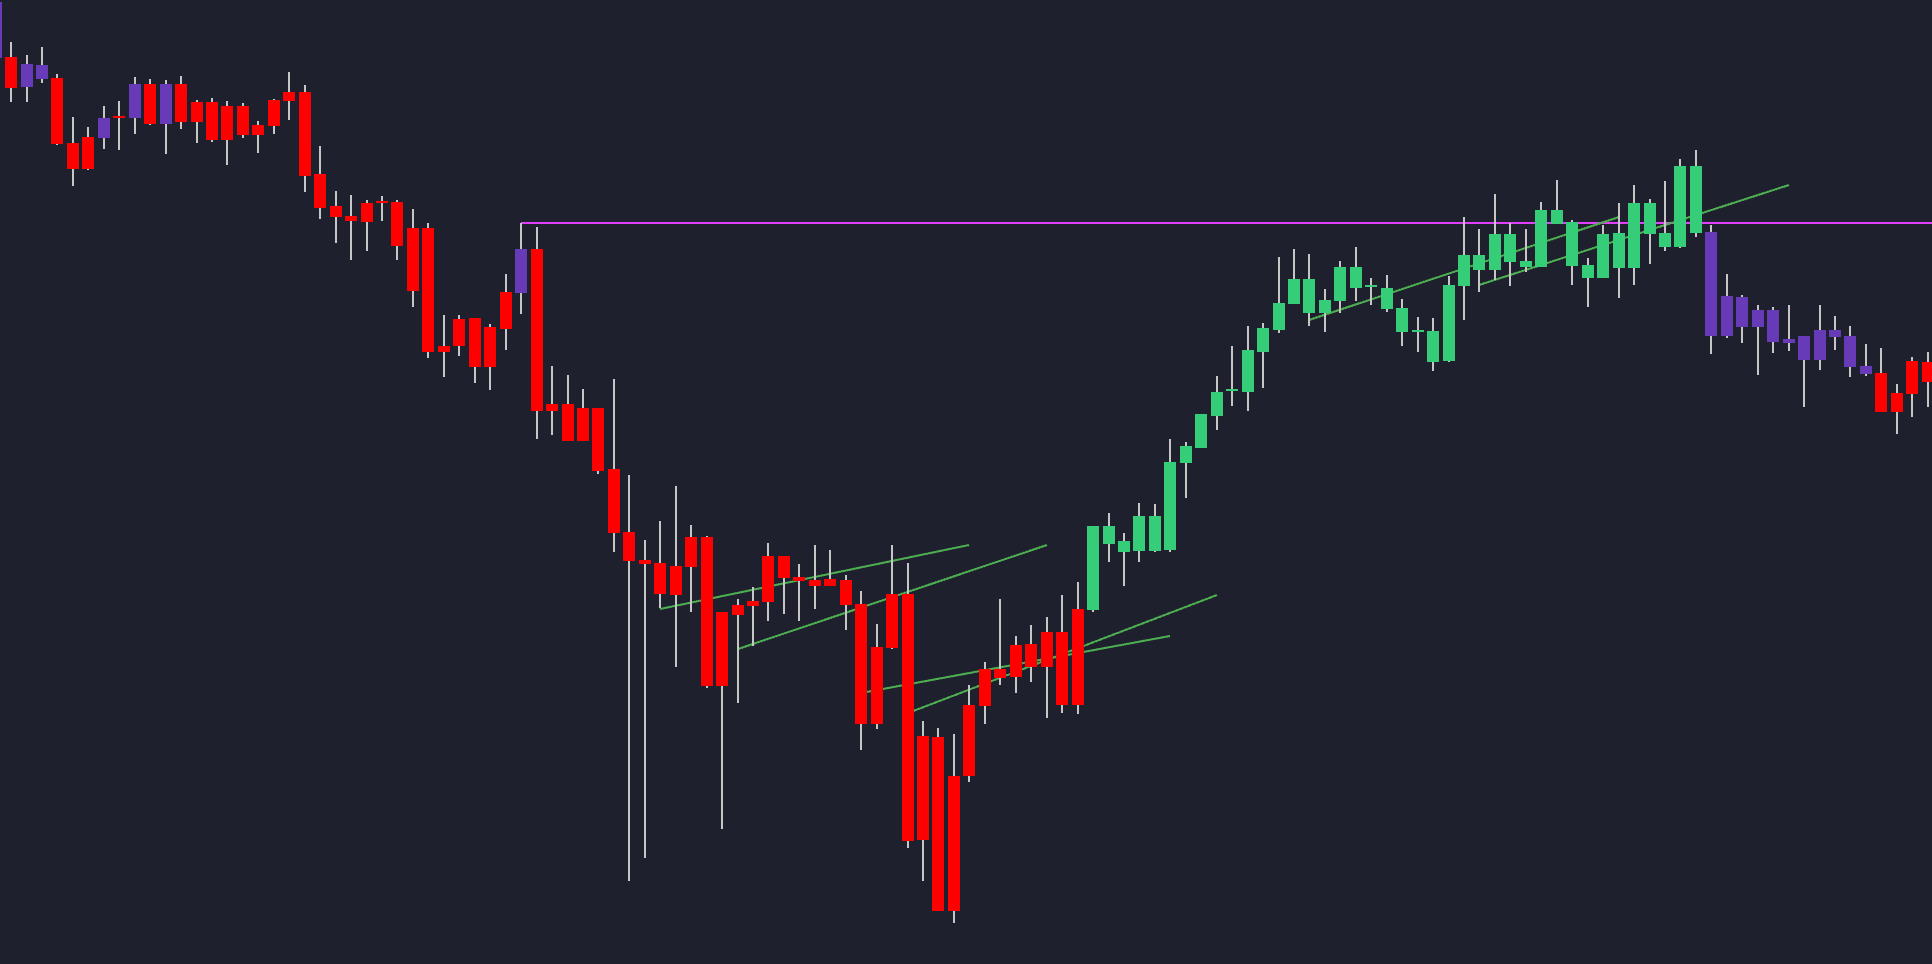
Example: @line(x1="5", y1="{high}", x2="0", y2="{high}", color="fuchsia") = {bearish_catcher}
In the example below, we used the line action to draw a line. We then added parentheses () to input arguments, specifying to the system that we want to draw the line at the high of the candles. Finally, we assigned the bearish Trend Catcher placeholder to the action, so it will trigger as long as the Trend Catcher is bearish.
The syntax for what arguments can be applied to each action can be found within the documentation.
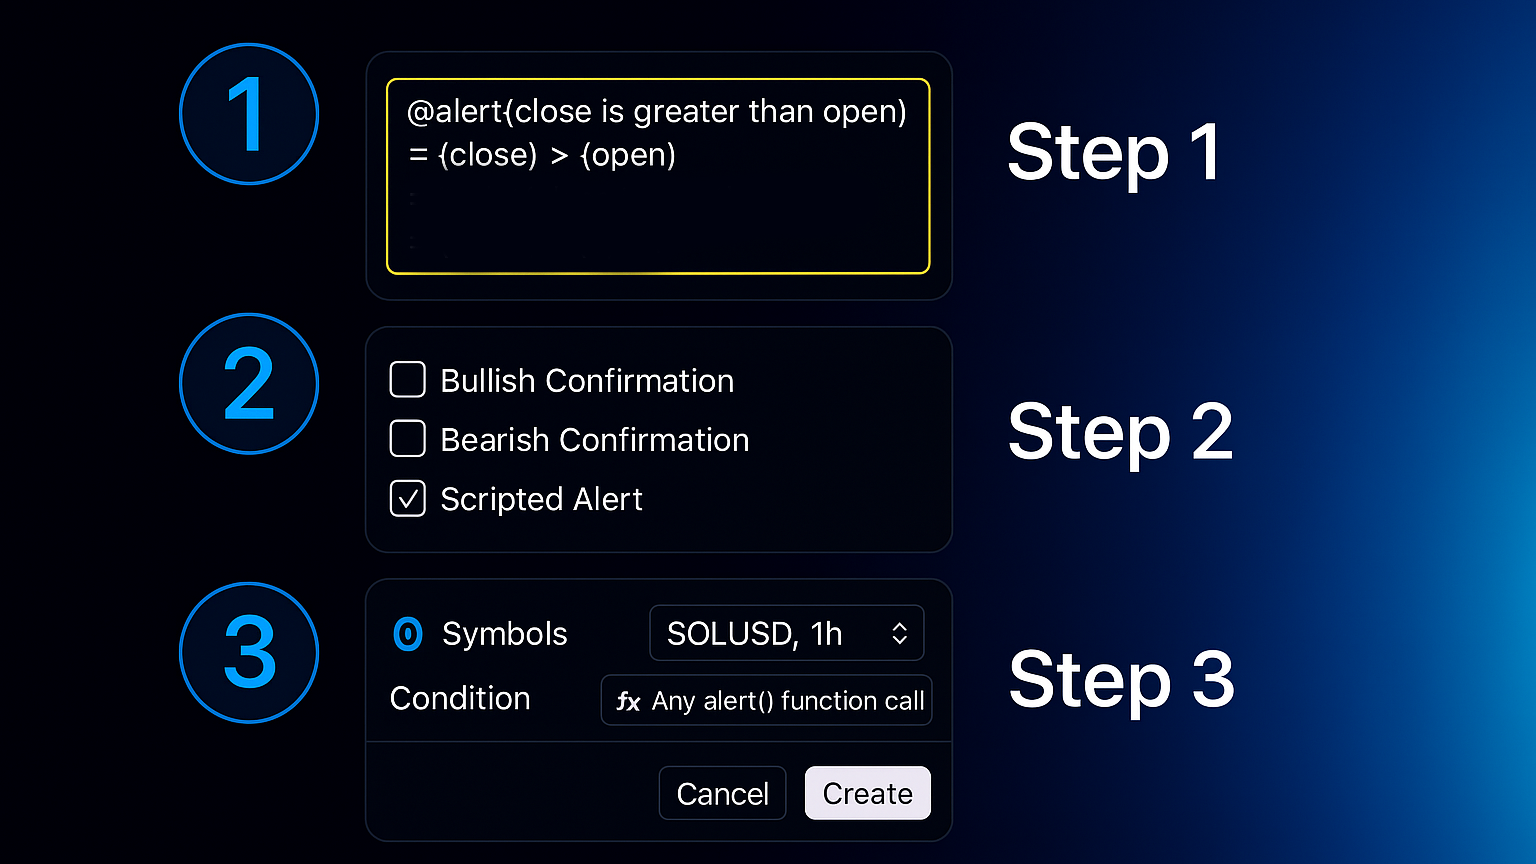
Alert Action : @alert
This action allows users to receive alerts when the associated condition is true. It also enables the creation of a large number of alerts using the toolkits – without the limitations of the other two alert features, such as the Custom Alert Creator and the pre-built alerts, which, while flexible, still have some constraints. By defining trigger conditions with Alert Scripting and assigning them to the Alert action, those limitations are effectively removed.
Syntax for this action is as shown:
@alert(close is greater than open) = {close} > {open}
Once you’ve created your alerts, make sure to enable “Scripted Alerts” under any alert function call to activate them.
Label Action: @label
The @label action allows users to draw labels on the chart when the associated condition is true. The labels can be drawn in a number of styles and colors which you can see in the documentation. Labels can be useful for identifying specific events on the chart and also debugging scripts. Your custom sequences of conditions can be applied to labels to more clear see their performance on the chart.
Syntax for this action is as shown:
@label(y, text, text_color, color, style, size)
Line Action: @line
The @line action allows users to draw lines on the toolkit pane when the associated condition is true. The arguments accepted by this action also allow lines to be drawn at an angle. This lets you create visual elements either between conditions or at specific levels of interest. More information on the accepted arguments is available in the documentation.
Syntax for this action is as shown:
@line(x1, y1, x2, y2, color)
Value When Action: @valuewhen
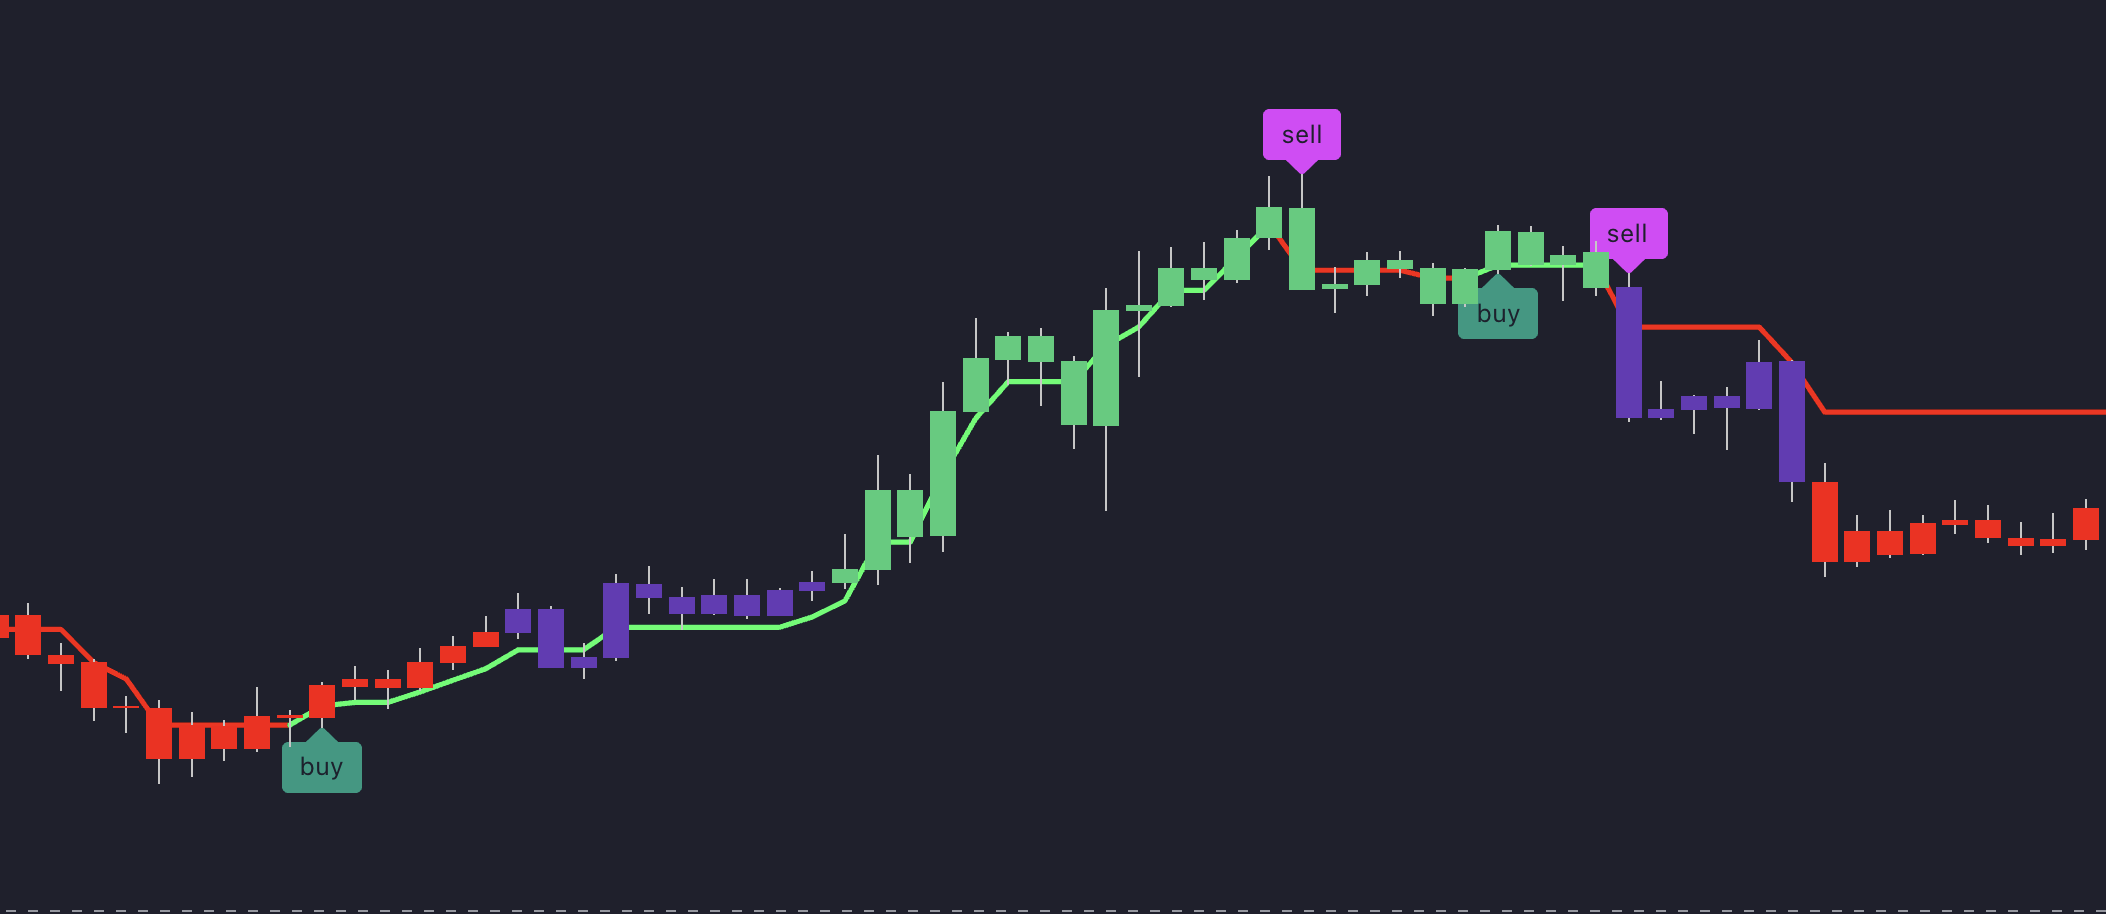
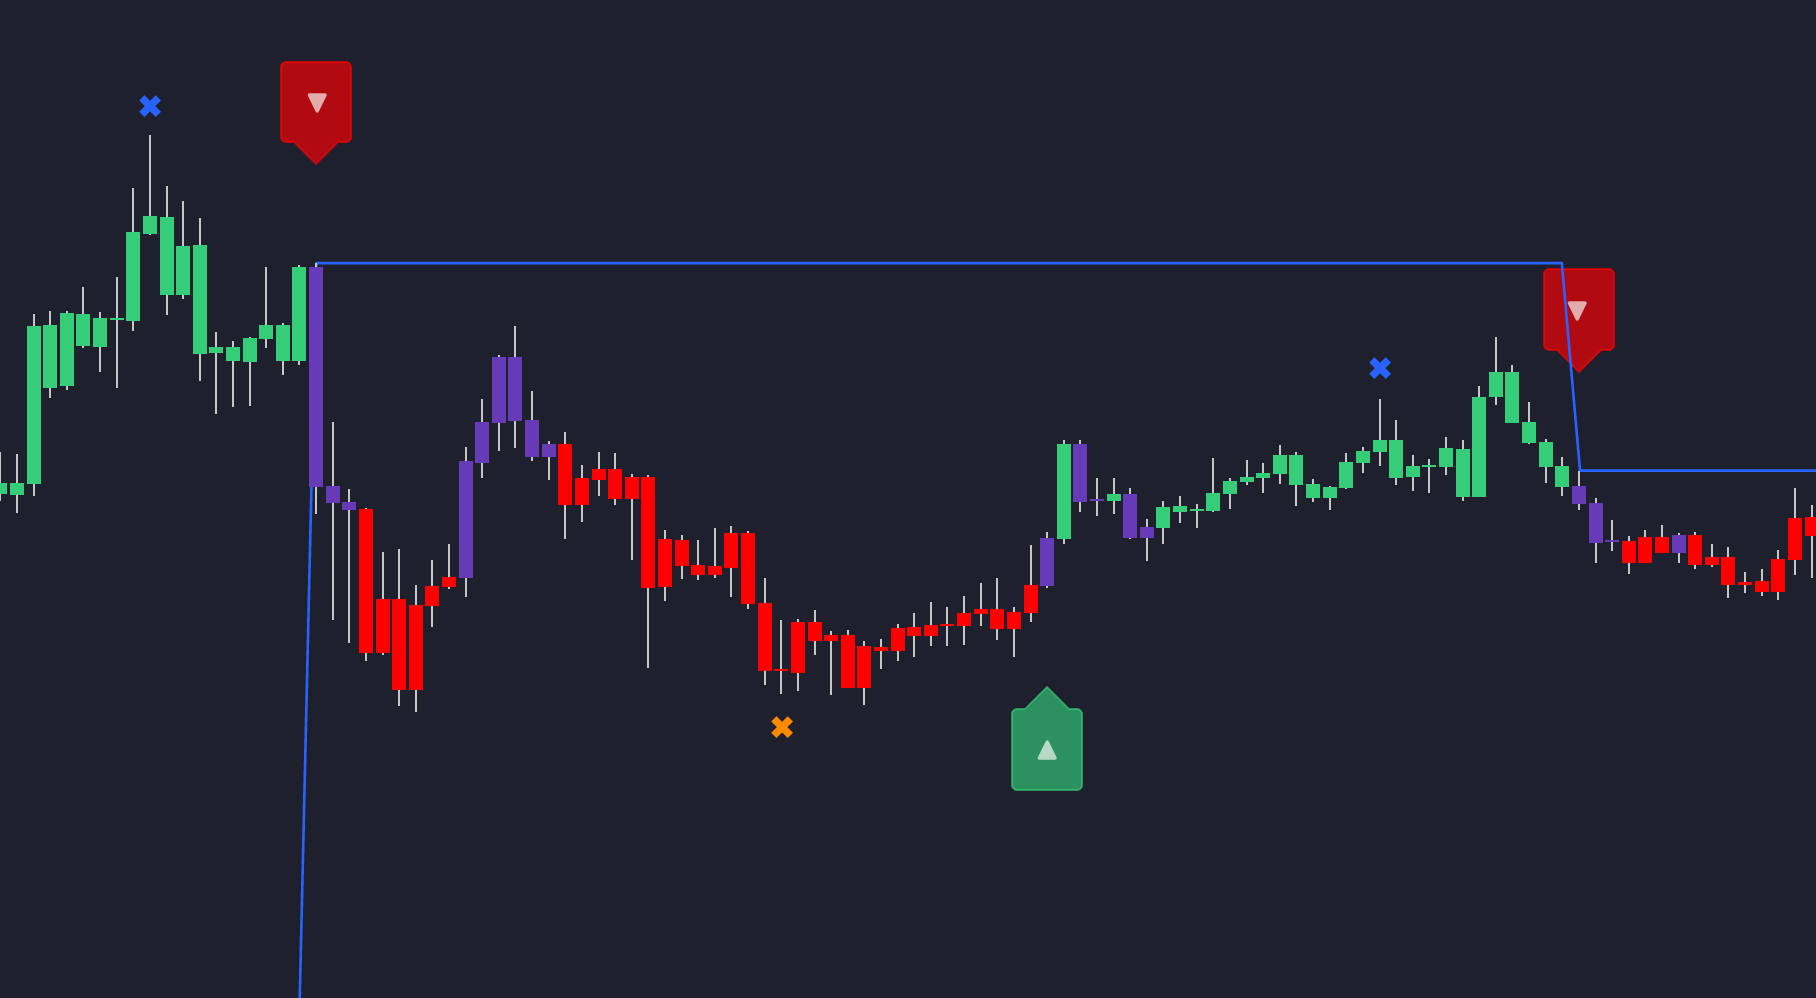
This action will plot a user-set value on the chart when the assigned condition is true. This can be useful for identifying specific levels when certain calculations are met or events occur. In the image below, we plot the high of the candle when bearish conditions are triggered, which in theory could be used for tracking a stop-loss level. More details on this action can be found within the documentation.
Syntax for this action is as shown:
@valuewhen(source)
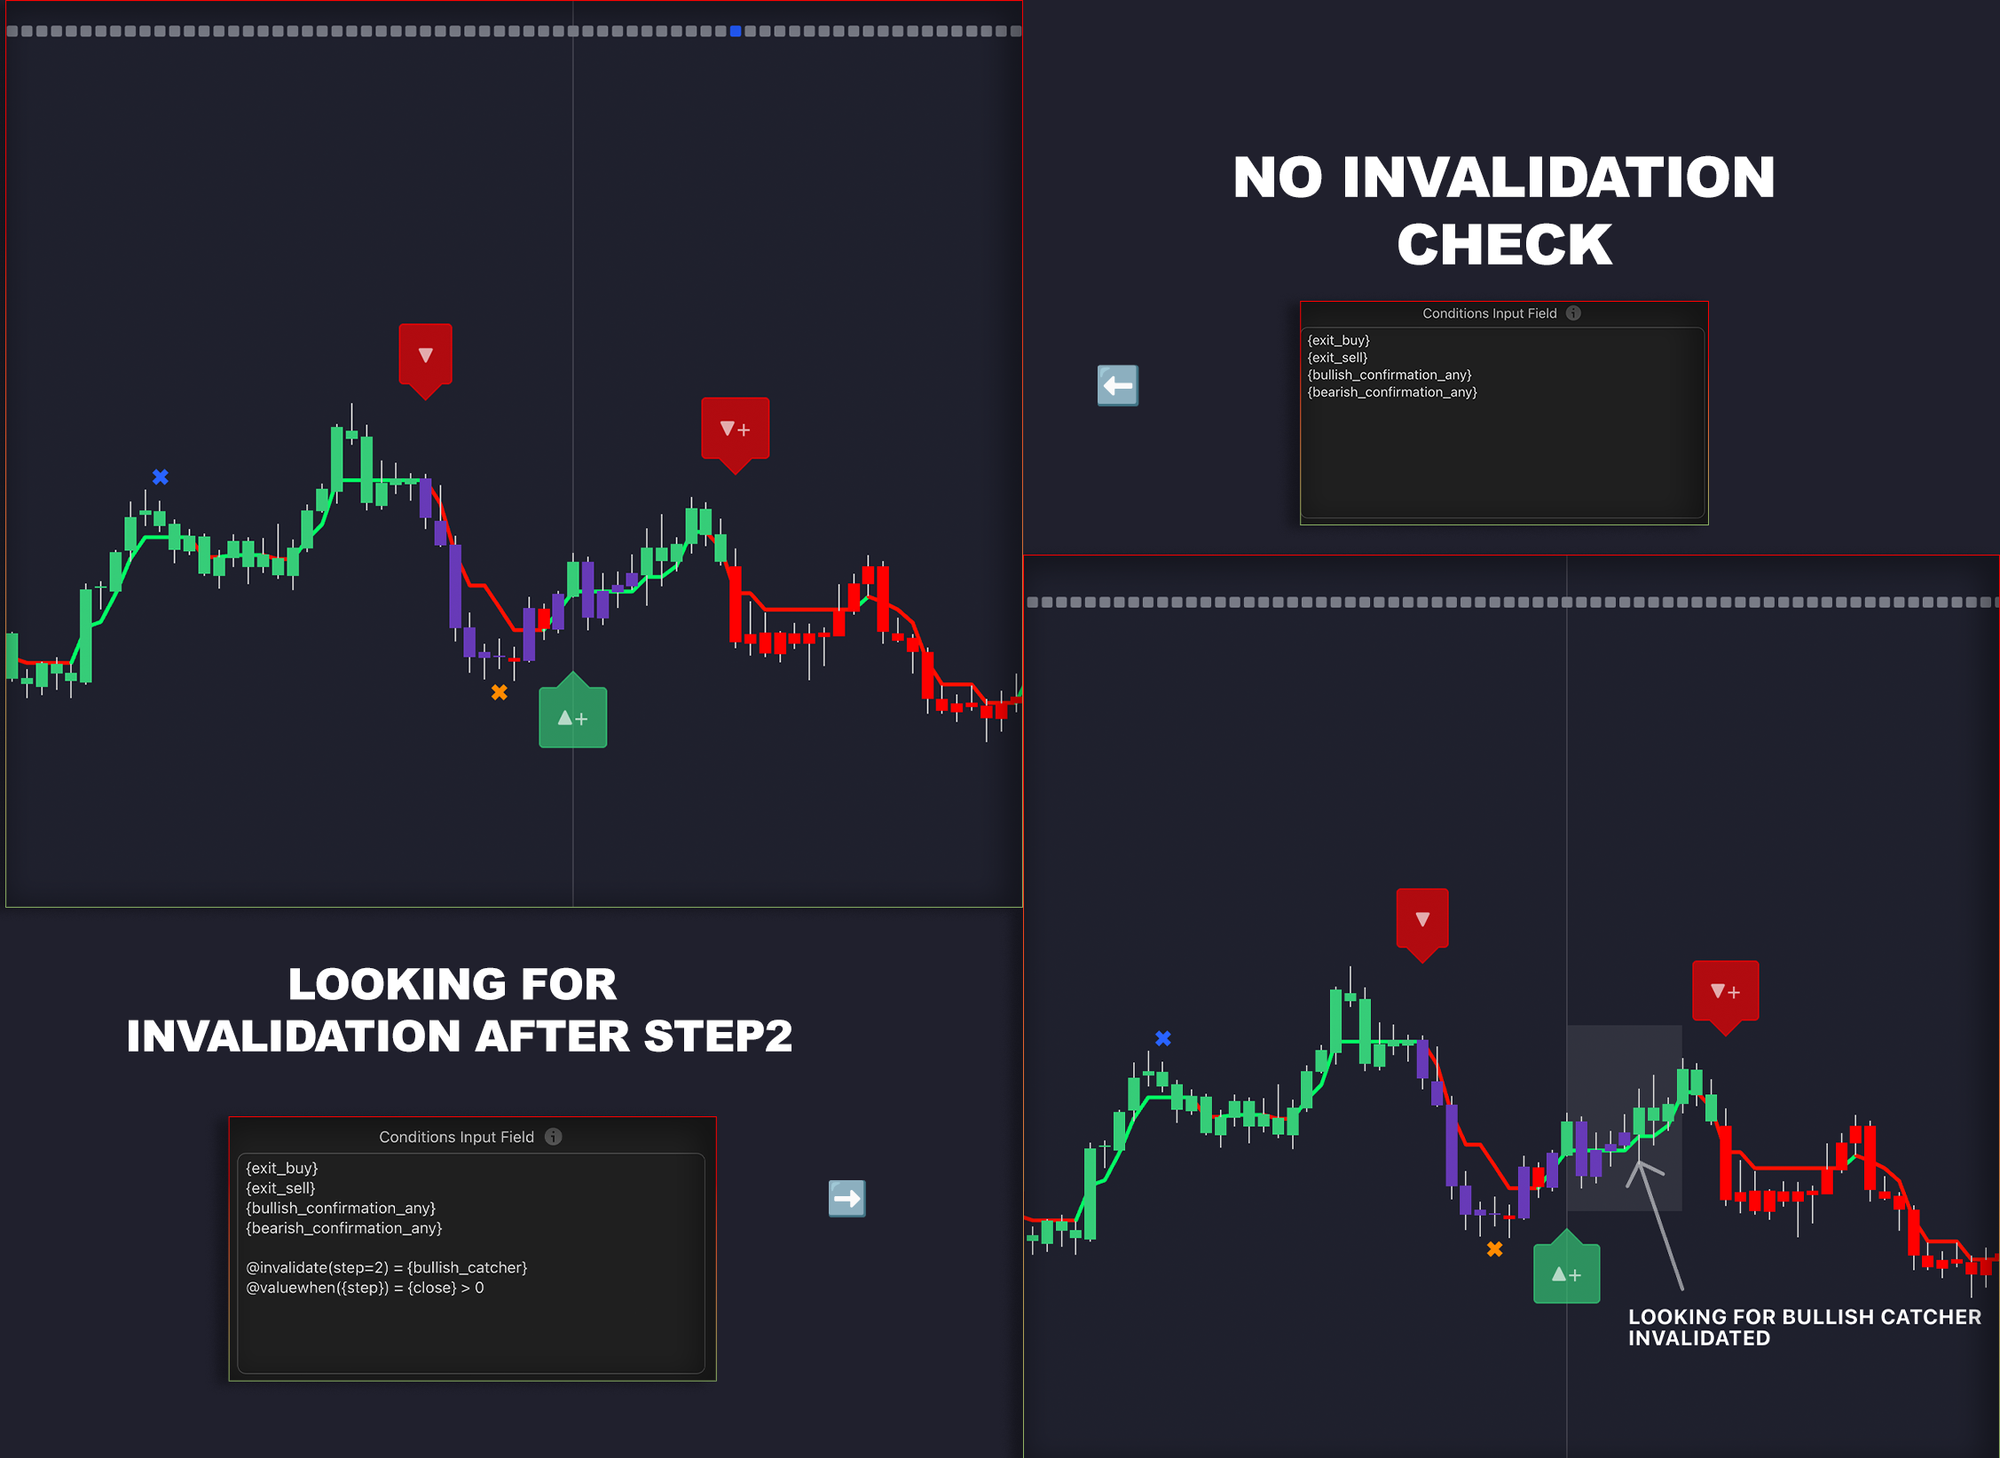
Invalidate Action: @invalidate
This action will allow you to invalidate a sequence of conditions when the assigned condition is true. Note that this replaces the previous method of invalidating sequences. This method allows users to have more control over what steps are being evaluated. You can replace prior methods used with the new syntax below:
Syntax for this action is as shown:
@invalidate(step)
The steps argument allows you to specify the exact step to start checking for an invalidation condition. This field can accept multiple steps and evaluate each one. If left blank, all steps will be evaluated. More details on this action can be found within the documentation.
In the example below we're looking for a bullish trend catcher after
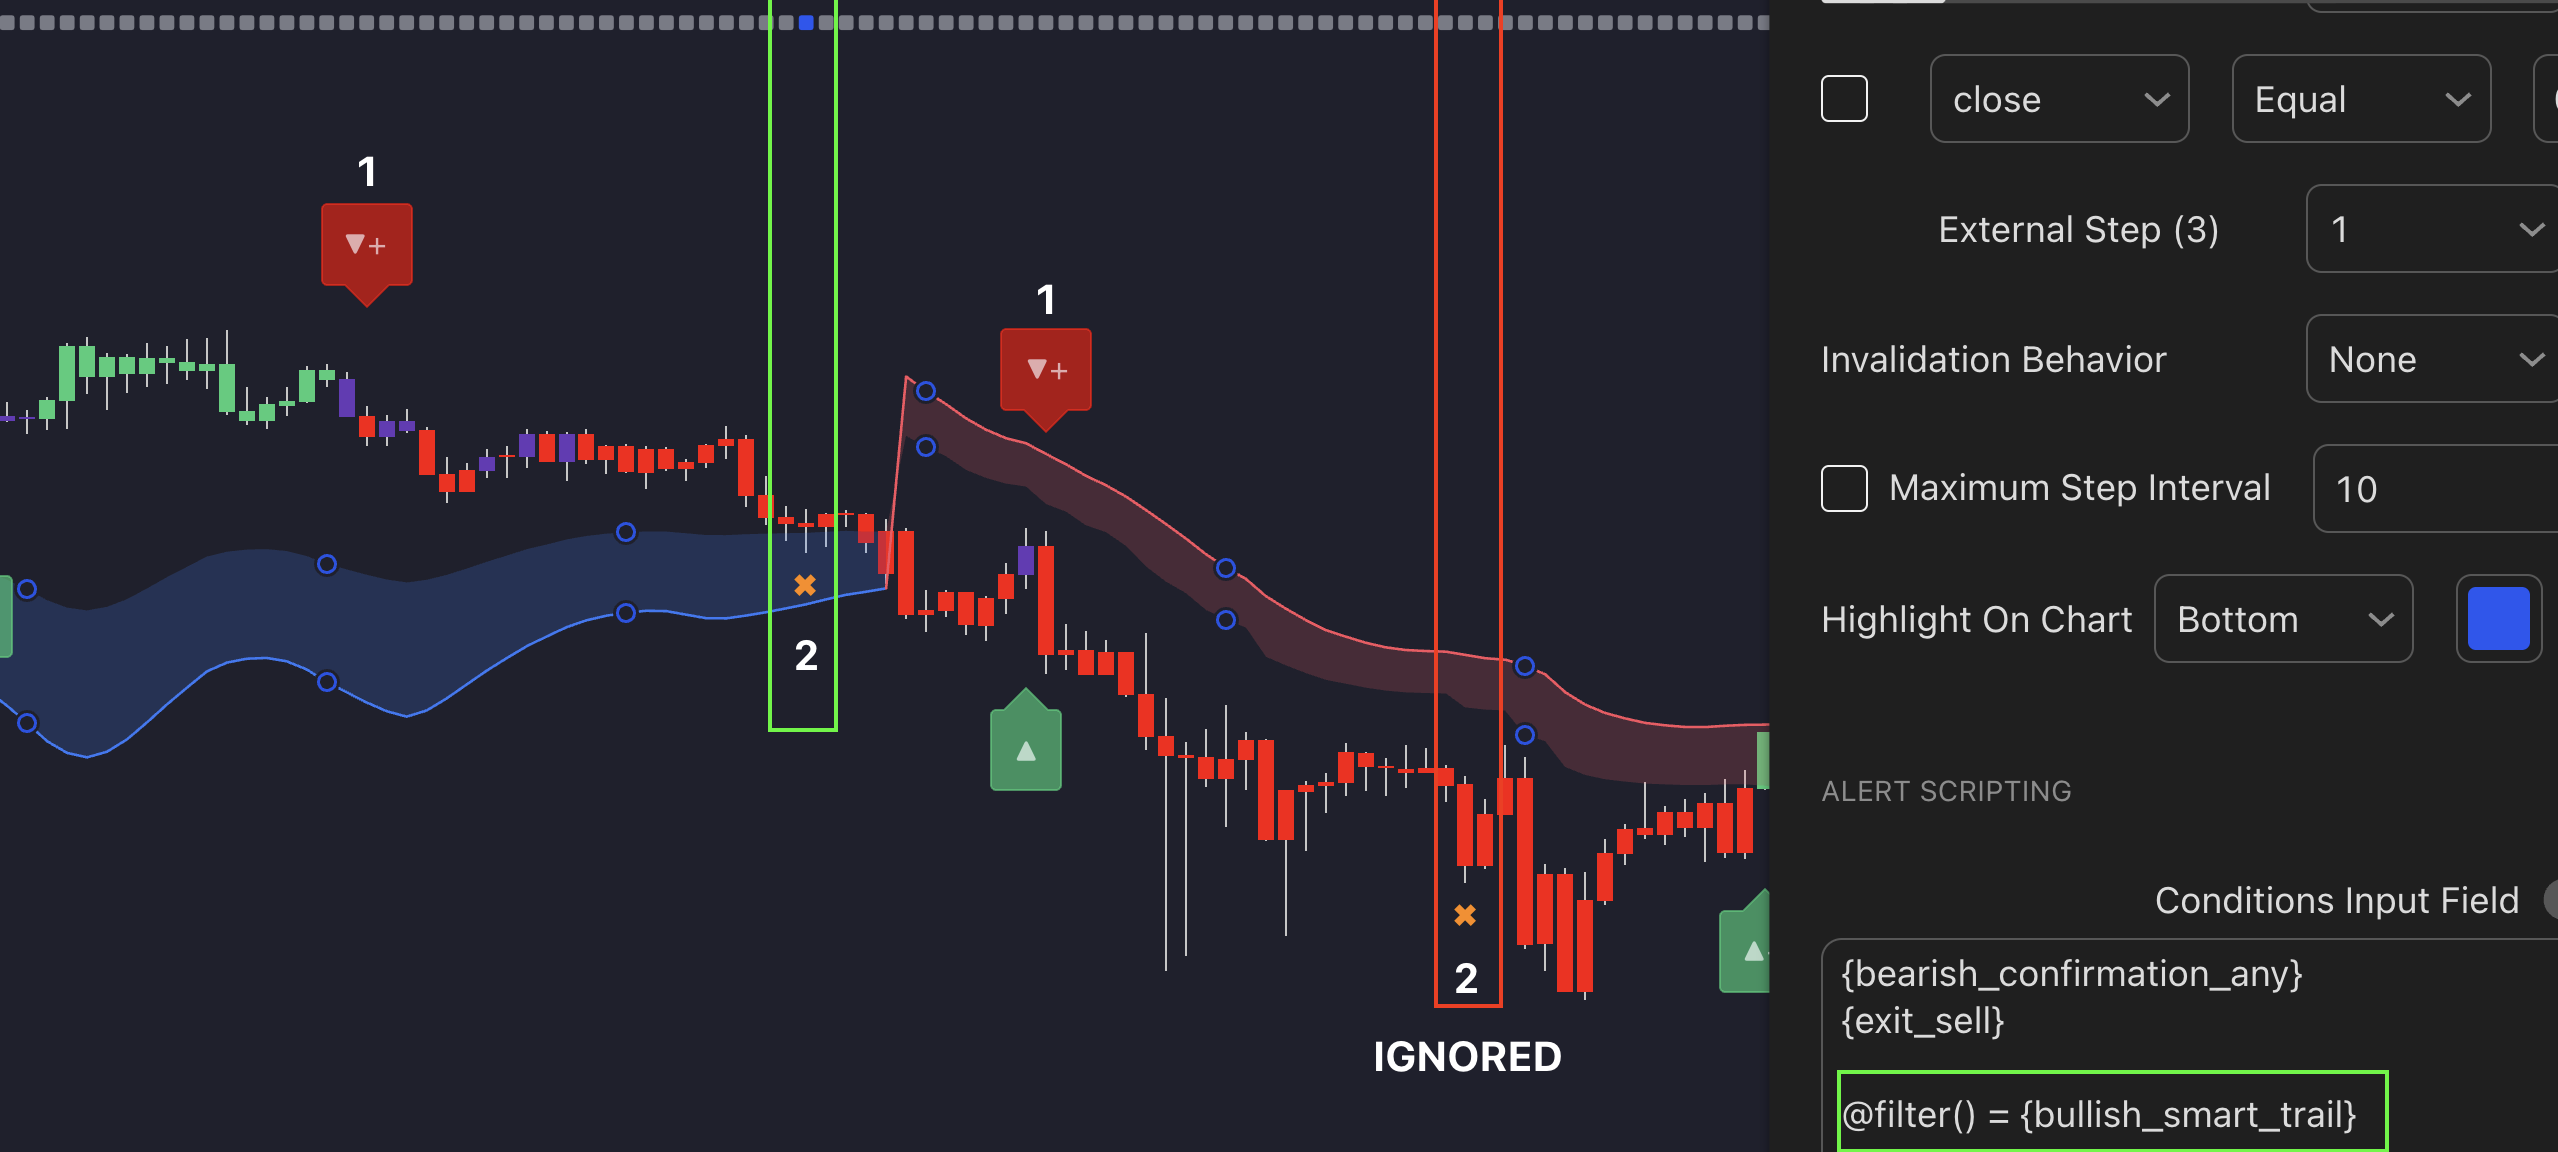
Filter Action: @filter
The Filter action allows you to apply a specific condition as a filter for all steps or for user-defined steps. You can think of it like the Smart Trail filter found in the Signals & Overlays toolkit. For instance, you might want to look for a specific confirmation signal, but only when the Smart Trail is bullish. Additionally, filters can accept multiple step values, giving you more flexibility in defining your conditions.
Syntax for this action is as shown:
@filter(step)
In this example we are only looking at bearish exit signals if the smart trail was still bullish.
Set Step Action: @set_step
This allows you to set the sequence step to a user defined value, or increase/decrease the current set by a user set increment/decrement.
Syntax for this action is as shown:
@set_step(value)
Value being the new value of the step.
For example if we have: (Assume UDPs already defined)
{bull} // Step 1
{bear} // Step 2
{bull+} // Step 3
{bear+} // Step 4
We can then reset any of these UDPs to the corresponding step
// Reset sequence to corresponding step
@set_value(0) = {bull} // Reset to step 1
@set_value(1) = {bear} // Reset to step 2
@set_value(2) = {bull+} // Reset to step 3
We hope you enjoy this update! You can find more information on this new feature here. You can also check out our Alert Scripting YouTube video for an overview of the Alert Scripting feature.